Dessert
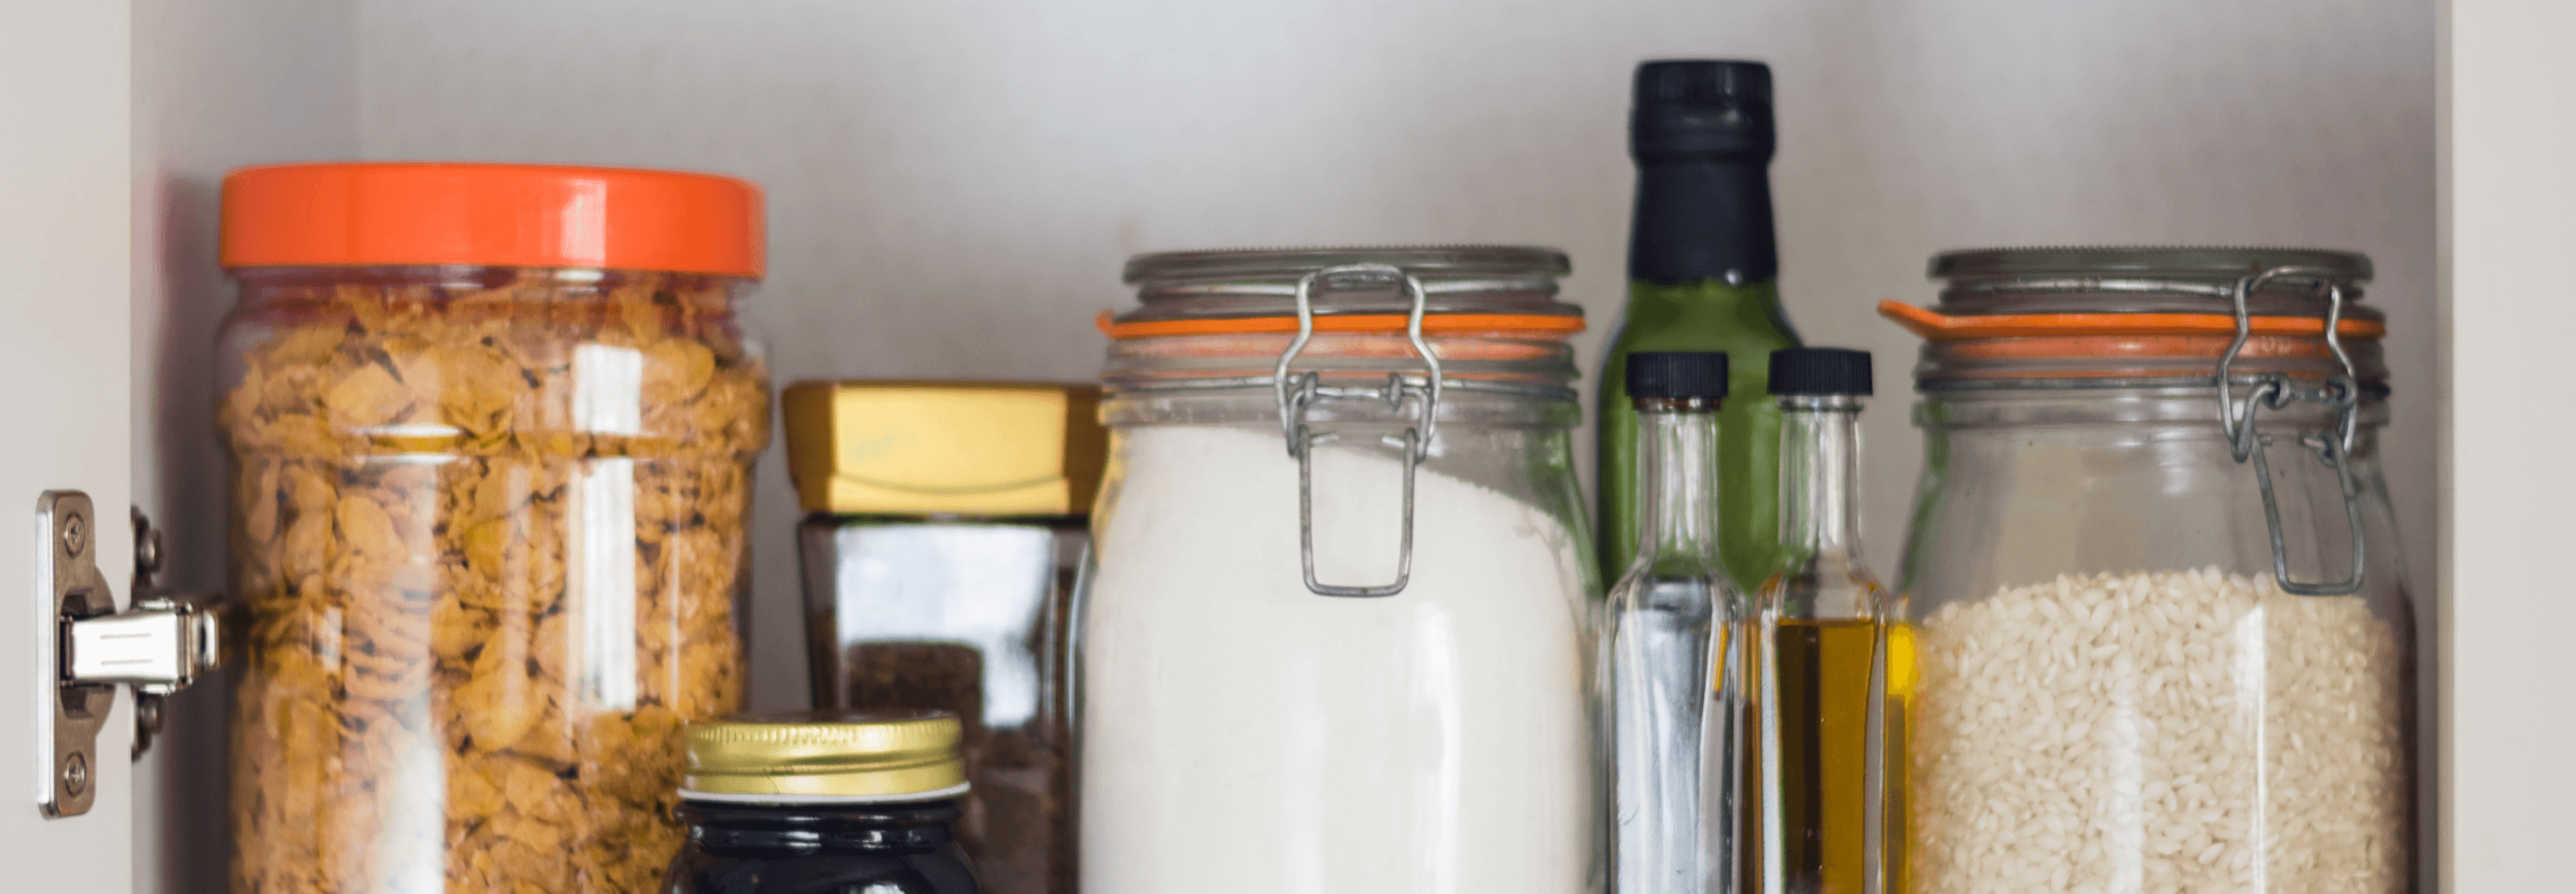
Cooking From Your Pantry
It’s mealtime. Your fridge is looking scarce, but there’s no time to go to the store. So you head to the pantry, scan your shelves of random ingredients, and begin formulating what you can quickly throw together. (Or maybe you’re just looking with a blank stare. That’s okay, too.) Does this situation sound familiar? If so, then this article is for you! We’ve compiled a list of our taste panel-approved recipes for breakfast, lunch, and dinner. Made with staples you likely have on hand, these recipes are great for days when you’re running low on time or your usual grocery items. Breakfast Out of cereal? Make a big batch of Muesli for easy breakfasts. (You can sub in whatever dried fruits or nuts you have, then mix it with yogurt, milk, or kefir!) Make a hearty Breakfast Quesadilla. Break out the bacon with this Sweet Potato and Bacon Skillet. Use any dried fruit you have to make these Fruit and Spice Muffins. Try a versatile and easy Refrigerator Oatmeal. Lunch With only five ingredients, these Creamy Chicken Taquitos are insanely good. Pair this Creamy Tomato Soup with grilled cheese for a classic lunch. Keep it simple with Where's The Bacon Quesadillas. Out of bread? Use pancake mix and create Pulled Pork Waffle Sandwiches. Want a healthier chicken nugget? Try these Baked Chicken Dippers. Get creative with these Pizza Wraps. Involve the kids and make Baked Corn Dogs. This Mac ‘n Cheese with Peas is the perfect comfort food. Throw this Honey Mustard Chicken on salad, rice, quinoa, or whatever you have. Sick of pasta and spaghetti sauce? Switch it up with Curried Tomato Pasta. Dinner A family favorite: Creamy Chicken Enchiladas. The Easy Chicken Parmesan Bake is the easiest Italian dish you will ever make. Just open some cans with this Slow Cooker Enchilada Soup. You might not have zucchini, but if you have potatoes and onions in the pantry and salmon in the freezer, this Norwegian Sheet Pan Salmon is a great option. Skip the pepper if you don’t have it, but the rest is likely in your pantry for this Instant Pot Quinoa Burrito Bowl. Swap fresh tomatoes for canned and make this crowd-favorite Vegan Chipotle Chili. Missing your favorite Indian restaurant? Try this Red Lentil Dhal. Use frozen broccoli and make Slow Cooker Beef and Broccoli. If you don’t have it, skip the kale, but still make this African Peanut Soup. Frozen veggies for the win! Try this Slow Cooker Teriyaki Chicken. If you have frozen broccoli or any other veggie, try making Honey Sriracha Chicken Rice Bowls. Snacks/Treats Apple Pizzas are a fun snack for kids. No marshmallows? Try these Peanut Butter Rice Crispy Treats. Craving something sweet? Try these Dark Chocolate Fruit Bites. Have protein powder? Try Protein Power Balls. And then make Chocolate Peanut Butter Protein Cups. Looking to boost your protein intake? Our new iFit Nutrition protein powders are a great way to do that and they taste delicious in just about any recipe! Also, if you’re sick of cooking, check out our line of delicious and filling meal replacements in the iFit Shop!
March 31, 2020
Read More
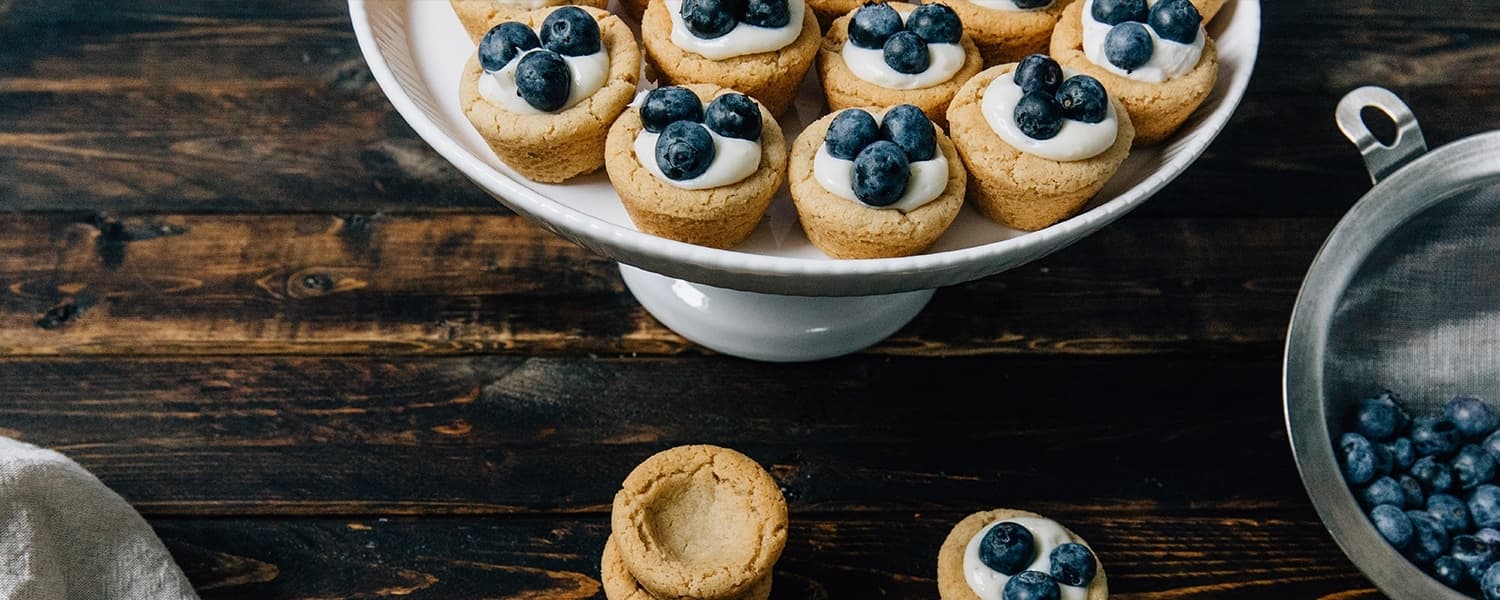
Mini Fruit Tarts
Ingredients ¾ cup granulated sugar ½ cup unsalted butter, softened but still cool 1 large egg 1 tsp vanilla extract 1½ cups Kodiak Superfood Pancake Mix 2 cups vanilla farmstyle Greek yogurt (this is thicker and works better than regular Greek yogurt, but make sure to use Tillamook 2%) 1 cup of fruit of choice, diced Directions Preheat oven to 350℉. In a large mixer, cream together sugar and butter. Add egg, vanilla extract, and pancake mix and continue to mix until a soft dough forms. Lightly spray a mini muffin pan. Roll 2 tablespoons of dough into a ball and place in the tin, pressing down softly. Bake at 350℉ for 8 minutes or until golden brown. Remove from the oven and press down the center, if needed, to make a cup. Cool completely before removing the cookies from the pan. Place 1 tablespoon yogurt in each cookie cup, then top with fruit. Serve immediately or cover and place in fridge until time to serve. *Analysis done with blueberries NUTRITIONAL INFO PER SERVING Calories 80 (30 from fat) Total fat 3.5g Saturated fat 2g Cholesterol 10mg Sodium 45mg Carbohydrate 10g (1g dietary fiber, 7g sugar) Protein 7g WARNING: This post is not intended to replace the advice of a medical professional. The above information should not be used to diagnose, treat, or prevent any disease or medical condition. Please consult your doctor before making any changes to your diet, sleep methods, daily activity, or fitness routine. iFit assumes no responsibility for any personal injury or damage sustained by any recommendations, opinions, or advice given in this article.
June 2, 2019
Read More
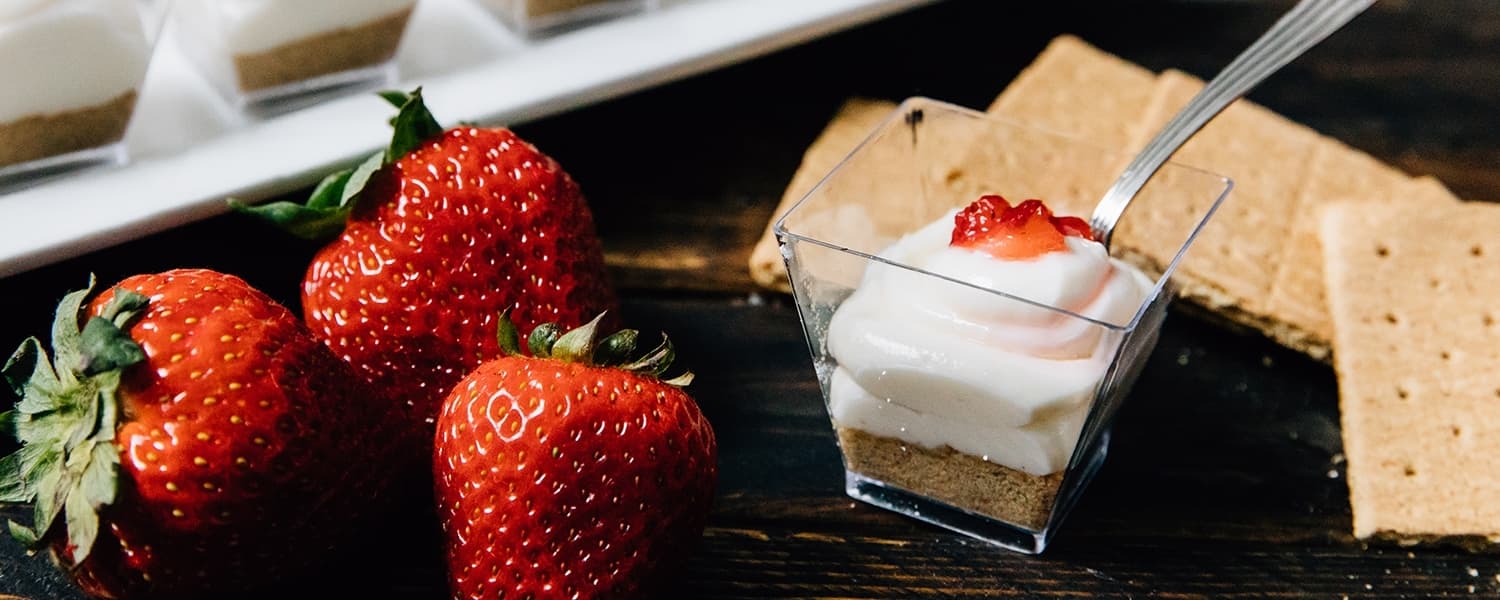
Cheesecake Shooters
Ingredients 8 ounces low fat cream cheese 1 cup Tillamook vanilla farmstyle greek yogurt 1½ cup powdered sugar 1 cup of crushed graham crackers 2 cups fruit of choice diced. Directions Blend together cream cheese and greek yogurt until smooth. Place 1 tablespoon of crushed graham crackers then layer with 3-4 tablespoons of cream cheese mixture (depending on shooter size). Top with a tablespoon of diced strawberries. Refrigerate until ready to eat and enjoy! NUTRITIONAL INFO PER SERVING Calories 120 (50 from fat) Total fat 6g Saturated fat 3g Cholesterol 15mg Sodium 80mg Carbohydrate 15g (1g dietary fiber, 11g sugar) Protein 3g WARNING: This post is not intended to replace the advice of a medical professional. The above information should not be used to diagnose, treat, or prevent any disease or medical condition. Please consult your doctor before making any changes to your diet, sleep methods, daily activity, or fitness routine. iFit assumes no responsibility for any personal injury or damage sustained by any recommendations, opinions, or advice given in this article.
May 31, 2019
Read More

Chocolate Strawberries
Ingredients 1 pound fresh strawberries 12 ounces high-quality (milk or dark) chocolate* Directions Make sure your strawberries are at room temperature—about 68°F. (If they are chilled at all, they will sweat after dipping. Also, your fruit must be completely dry, so no washing immediately prior to making this recipe. Buy pre-washed, or wash, then let them dry for at least a day before dipping.) Melt the chocolate either in a double boiler or a microwave. (If melting in the microwave, heat for 3 minutes at 20–30% power, stir, then repeat until melted. If melting in a double boiler, heat on low and allow the chocolate to melt for 15–20 minutes while mixing. You don’t want to get the chocolate too hot or allow steam from the bottom pot to come out and get into the chocolate, so do not boil the water in the base pot. To make sure that your pots aren’t getting too hot and burning the chocolate, you should be able to touch, but not leave your hand on, the lower pot. You should also be able to touch and comfortably leave your hand on the top pot. It should be just warmer than room temperature.) Let it cool to 68–72°F. Otherwise, it will streak. (To know if your chocolate is ready without using a thermometer, pull out a small amount of chocolate with a fork, then let it drizzle back into the bowl. The drizzled bit should remain on top and not melt back in. At this point, your chocolate is ready to use.) Hold the stem of each berry, then dip about ¾ into the chocolate. Pull out and let drip, then place on parchment paper to cool. Top with coconut, sprinkles, or other toppings, if desired, while chocolate is still soft. Cool. (This will work best if your kitchen is at about 68°F. You may want to open a window to make sure your kitchen is cool enough for the chocolate to set.) Enjoy! (You can store any leftovers in the fridge...but I doubt there will be any!) *Be sure to use high-quality chocolate—preferably designed for chocolate making. Use nothing that contains wax. NUTRITIONAL INFO PER SERVING Calories 90 (40 from fat) Total fat 4.5g Saturated fat 3g Cholesterol 0mg Sodium 0mg Carbohydrate 13g (1g dietary fiber, 10g sugar) Protein 1g WARNING: This post is not intended to replace the advice of a medical professional. The above information should not be used to diagnose, treat, or prevent any disease or medical condition. Please consult your doctor before making any changes to your diet, sleep methods, daily activity, or fitness routine. iFit assumes no responsibility for any personal injury or damage sustained by any recommendations, opinions, or advice given in this article.
April 17, 2019
Read More
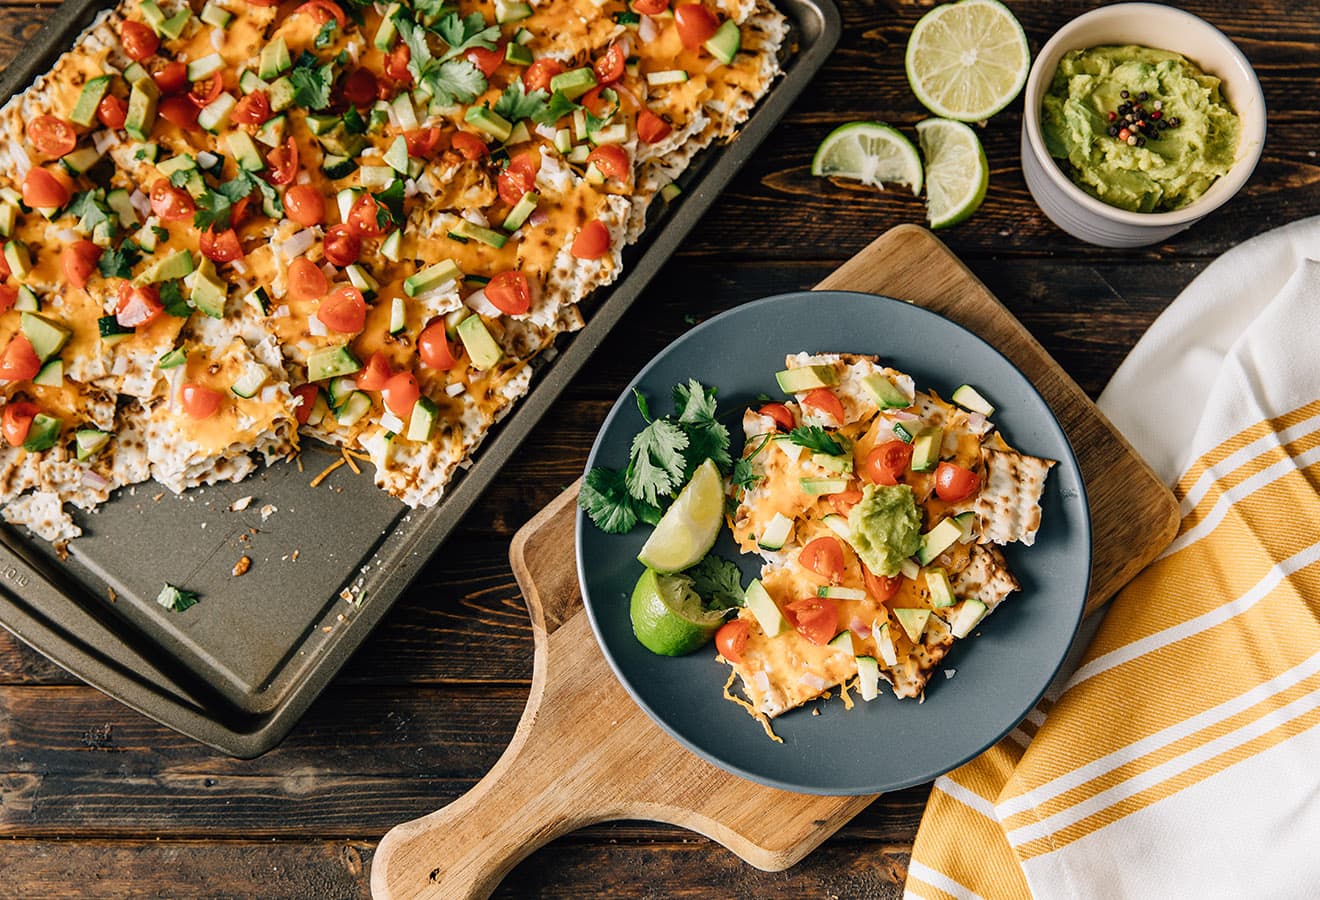
Quick and Easy Passover Recipes
As a little girl, I was taught that Passover celebrates perseverance and freedom, both of which are extraordinarily important when understanding the history of the Jewish people. However, there is only so much perseverance that can be expected of a person when it comes to eating matzo for eight days! Matzo is an unleavened cracker that is a fundamental component of the Passover festival, where leavened wheat, barley, rye, oats, and spelt are prohibited. Basically, for eight days, Jewish people can't eat bagels, bread, pasta, muffins, regular crackers—all the delicious carbs we know and love. Instead, we eat matzo. I asked our nutrition team to come up with some delicious alternatives to the traditional matzo pizza I eat at least once a day during Passover. Thankfully, after some fun experimenting in the kitchen, they came up with healthy, tasty, and easy recipes that are guaranteed to make Passover a more enjoyable experience. For those of you who don't celebrate Passover, these recipes are still worth a try! Matzo is a lower-carb alternative to traditional bread and has very simple, minimal ingredients. It also has a wonderful, crunchy texture and is really tasty (if you don't eat it for eight days straight!) Matzo Nachos Fresh veggies, melted cheese, and tons of flavor! These Matzo nachos are filling, delicious, and really easy to put together. Matzo is available in most grocery stores year round, so consider switching out the deep-fried tortilla chips for some equally tasty matzo to lighten this meal up. Get the recipe Fresh Veggie Matzo Pizza A new spin on the classic matzo pizza, this veggie matzo pizza switches out the melted cheese with savory cream cheese and tons of fresh veggies. This is a perfect opportunity to get creative and experiment with toppings. Get the recipe Matzo Crusted Chicken Tenders My personal favorite! These chicken tenders are so delicious and feel far more indulgent than they actually are. Pair them with some kosher ketchup and you have a far healthier alternative to fried chicken tenders. Again, this is a great recipe to have on-hand throughout the year when you're craving some chicken nuggets but want to make a healthier choice! Get the recipe Matzo Fruit Pizza Instead of a tasteless sponge cake, do yourself and your guests a favor this Passover and make this matzo fruit pizza instead. The white chocolate adds a little sweetness, while simultaneously creating a barrier between the yogurt and matzo so the crust doesn’t get soggy. The fruit adds a level of freshness that really balances out the yogurt and white chocolate. Pro tip: Make at least five of these because they will go fast. Get the recipe I hope you enjoy these recipes as much as I do, and that they will add a little excitement to your Passover meals this year! If you choose to recreate these recipes or have other favorite Passover recipes, please tag us on Instagram @iFit so we can see your tasty photos!
April 10, 2019
Read More

Healthier Mint Chocolate Cookies
Ingredients Cookies 1 (15-ounce) can black beans, drained and rinsed 3 tablespoons applesauce 2 tablespoons honey 1 tablespoon pure vanilla extract 3 drops peppermint extract ½ teaspoon salt ½ teaspoon baking soda ½ teaspoon baking powder 2 tablespoons whole wheat pastry flour 6 tablespoons cocoa powder ¼ cup mini dark chocolate chips Chocolate coating ½ cup mini dark chocolate chips 2 teaspoons coconut oil 1 drop peppermint extract Directions Leaving out the mini dark chocolate chips, place all ingredients in a food processor. Blend until smooth, making sure to scrape the sides. Stir in the chocolate chips, then chill for 20 minutes. While the dough chills, preheat the oven to 350°F. Roll the chilled dough into little balls, then flatten them. They should be about the size of a quarter. Place on a greased or parchment-lined baking sheet. Bake for 15–18 minutes. Cool completely on the baking sheet. (This helps make them crunchy!) Once cookies have cooled completely, melt the chocolate for the coating. In a microwave-safe bowl, add the chocolate and coconut oil. Microwave for 30 seconds at a time, stirring in between until completely melted. Once chocolate is melted, add the peppermint oil and stir. Dip the cookies in the chocolate, then place on a foil- or parchment-lined pan. Cool until the chocolate hardens. Store in an airtight container. *Pro tip: Enjoy these frozen for a cool treat! NUTRITIONAL INFO PER SERVING Calories 80 (25 from fat) Total fat 3g Saturated fat 1.5g Cholesterol 0mg Sodium 150mg Carbohydrate 12g (3g dietary fiber, 6g sugar) Protein 2g WARNING: This post is not intended to replace the advice of a medical professional. The above information should not be used to diagnose, treat, or prevent any disease or medical condition. Please consult your doctor before making any changes to your diet, sleep methods, daily activity, or fitness routine. iFit assumes no responsibility for any personal injury or damage sustained by any recommendations, opinions, or advice given in this article.
April 2, 2019
Read More

Chocolate Sandwich Cookies
Ingredients Cookies ¾ cup whole wheat pastry flour 6 tablespoons Dutch cocoa powder 6 tablespoons sugar ¼ teaspoon salt ¼ teaspoon baking soda 1 teaspoon pure vanilla extract ¼ cup coconut oil 3 tablespoons milk of choice 2 tablespoons honey Filling ½ cup powdered sugar ½ teaspoon pure vanilla extract ¼ cup coconut oil Directions: In a medium-sized bowl, whisk together pastry flour, cocoa powder, sugar, salt, and baking soda. In a separate bowl, cream together the vanilla, coconut oil, milk, and honey until well combined. Add the wet ingredients to the dry ingredients and mix until a dough forms. Place the dough on a large piece of plastic wrap, then form into a flat disc. Wrap the disk, then chill for 20 minutes. While dough is chilling, preheat the oven to 300°F. Flour a clean counter space, then place the dough on it. Roll out the dough until it’s about ¼-inch thick, then cut small circles out. Place the circles on a greased cookie sheet. Repeat with scrap dough. Bake for 10 minutes. Remove from oven and cool on the pan for 10 minutes. (This allows the cookies to harden up a bit.) While cookies are cooling, make the cream filling. Blend together all the ingredients for the filling until smooth. Place about two teaspoons of the cookie filling on top of one of the chocolate cookies, then top with another cookie to create a sandwich. Repeat with the remaining cookies and filling. Keep in an airtight container. (I like to freeze mine!) NUTRITIONAL INFO PER SERVING Calories 120 (70 from fat) Total fat 8g Saturated fat 6g Cholesterol 0mg Sodium 60mg Carbohydrate 15g (1g dietary fiber, 10g sugar) Protein 1g WARNING: This post is not intended to replace the advice of a medical professional. The above information should not be used to diagnose, treat, or prevent any disease or medical condition. Please consult your doctor before making any changes to your diet, sleep methods, daily activity, or fitness routine. iFit assumes no responsibility for any personal injury or damage sustained by any recommendations, opinions, or advice given in this article.
April 2, 2019
Read More
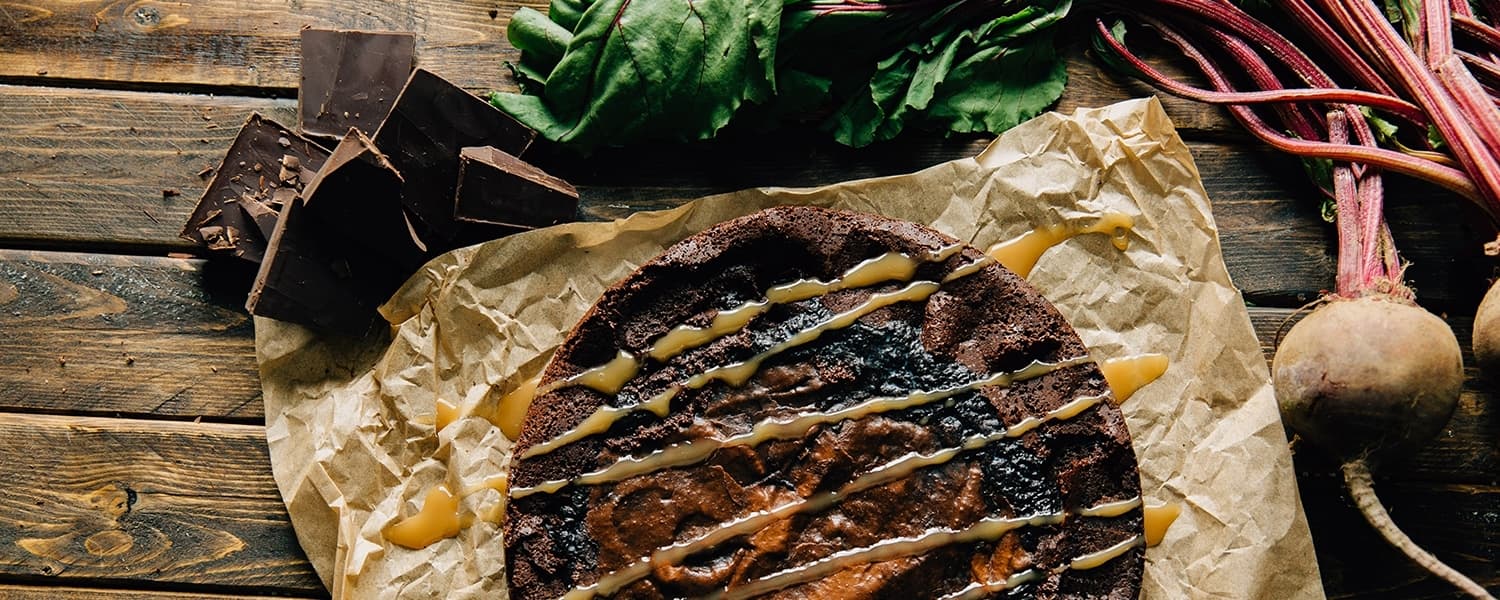
Vegan Chocolate Beet Torte
Ingredients ½ cup cocoa powder ½ cup brown sugar 1 ¼ cup sugar 1 (14.5 oz) can beets, drained 2 teaspoons vanilla ½ teaspoon salt 1 teaspoon baking powder ½ teaspoon baking soda 8 ounces chocolate, melted Directions Preheat oven to 375°F. Prepare a springform pan. I usually place parchment paper on the bottom, then spray it with cooking spray, but you can also just use cooking spray. In a food processor, add all of the ingredients, then blend until smooth. Pour into the springform pan, then bake for 30 minutes. The torte will not be set. Remove from the oven, then cool to room temperature before placing in the fridge. Chill for at least an hour, or until it is set. NUTRITIONAL INFO PER SERVING Calories 300 (80 from fat) Total fat 9g Saturated fat 5g Cholesterol 0mg Sodium 400mg Carbohydrate 61g (4g dietary fiber, 54g sugar) Protein 3g WARNING: This post is not intended to replace the advice of a medical professional. The above information should not be used to diagnose, treat, or prevent any disease or medical condition. Please consult your doctor before making any changes to your diet, sleep methods, daily activity, or fitness routine. iFit assumes no responsibility for any personal injury or damage sustained by any recommendations, opinions, or advice given in this article.
July 16, 2018
Read More
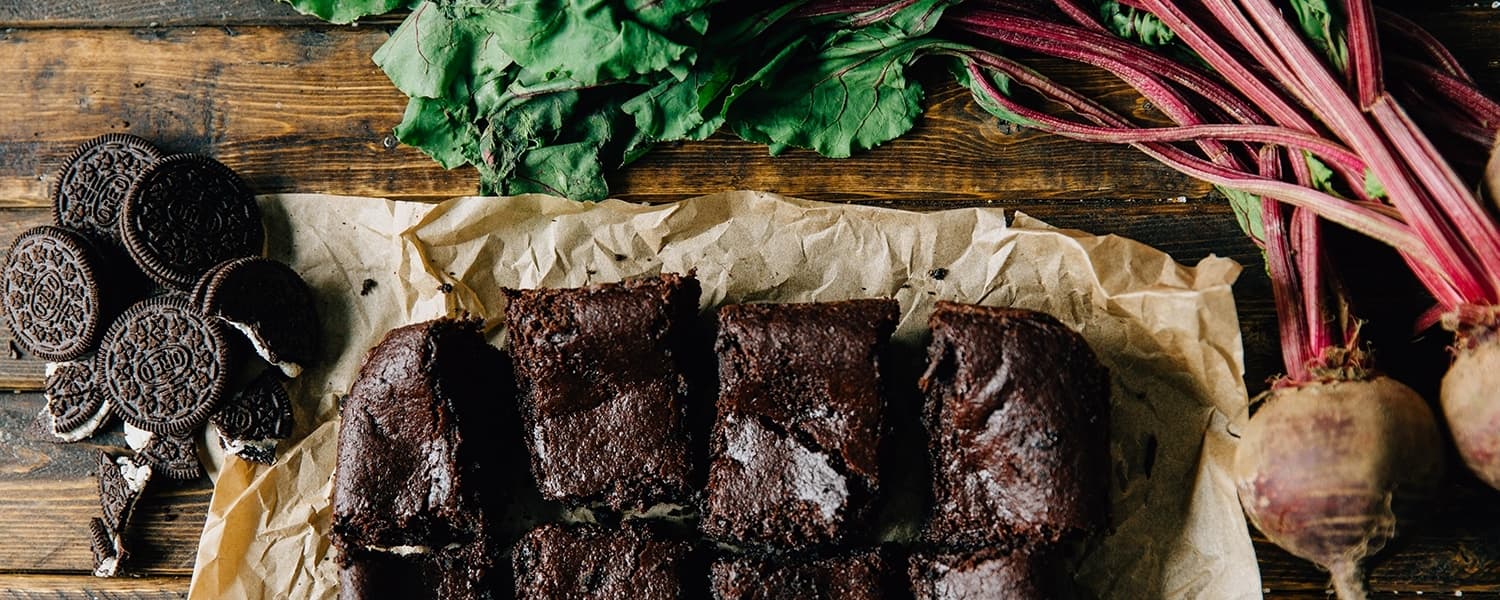
Vegan Oreo®-Crusted Beet Brownies
Ingredients Oreo crust 24 Oreos 3 tablespoons vegan butter, melted Beet brownie batter 1 cup + 2 tablespoons flour ½ cup cocoa powder 1 teaspoon baking powder ½ teaspoon baking soda ¼ teaspoon salt 1 cup canned, sliced beets ½ cup beet water (from the can) 1¼ cups sugar 1 tablespoon vanilla Directions Grease an 8x8” pan. Place the Oreos in a food processor, then process until they are finely crushed. In a medium bowl, place the crushed Oreos and melted butter. Mix together. Firmly press the Oreo mixture into a pan, then place in the freezer while you make the brownie batter. Preheat the oven to 350°F. In a large bowl, mix together the dry ingredients: flour, cocoa, baking powder, baking soda, and salt. In a food processor, place the beets, beet water, sugar, and vanilla. Blend until smooth. Add the beet mixture to the bowl of dry ingredients, then stir until smooth. Top the Oreo crust with the beet brownie mixture, then place in the oven. Bake for 1 hour or until the brownies are set. Remove and cool. These tasty brownies are actually best served chilled. NUTRITIONAL INFO PER SERVING Calories 250 (70 from fat) Total fat 8g Saturated fat 2g Cholesterol 0mg Sodium 290mg Carbohydrate 44g (2g dietary fiber, 25g sugar) Protein 3g WARNING: This post is not intended to replace the advice of a medical professional. The above information should not be used to diagnose, treat, or prevent any disease or medical condition. Please consult your doctor before making any changes to your diet, sleep methods, daily activity, or fitness routine. iFit assumes no responsibility for any personal injury or damage sustained by any recommendations, opinions, or advice given in this article.
July 16, 2018
Read More